 |
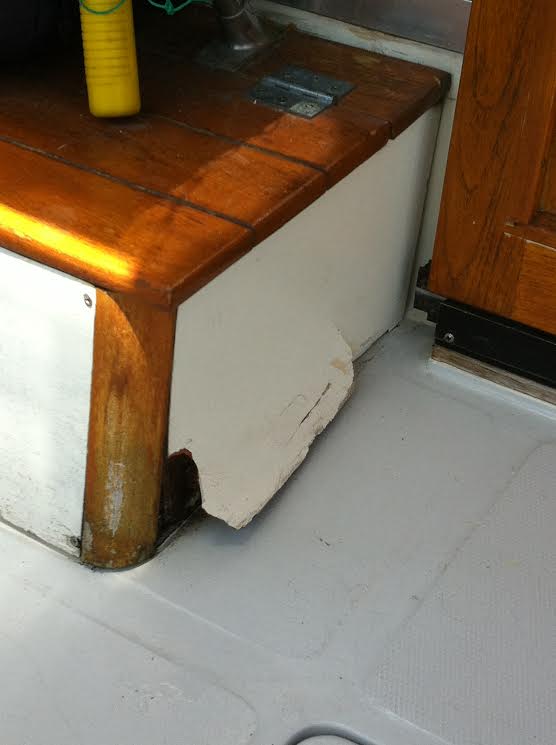
| Original damaged area |
Well, like every project I undertake that requires some talent as an electrician or a plumber or a carpenter or mechanic, it IS a big deal.
However, in the past I have found that in many instances, patience, a lot of careful study and going at it slowly, usually results in success. Thus, I began the process of learning what I needed to do to make this little project work and along the way I learned a lot.
The small 10 by 15 inch panel was rotting and as it was very visable, it got to look really bad. At least it looked bad to me. I noticed it everytime I boarded the boat. I'd cuss the thing a bit under my breath, shake my head and tell my wife I have got to figure out how to fix that.
 |
| Tearing into the project, I found more rot. |
So, I started by doing a lot of research on line. I posted a question on the Bayliner Owner's Club's question forum, and asked questions of boating friends. Slowly the planning portion of the project came together. I found I needed to purchase some specific tools I didn't have. I needed specific materials to do the job, marine plywood, epoxy, brushes, gloves, sandpaper, etc.
 |
| 2 X 4 foot piece of marine plywood |
 |
| Measure five times, cut once! |
At $50 for a half sheet of marine plywood, I really wanted to get this right the first time. I purchased a square and a finishing blade for my skill saw and began measuring, checking, rechecking, double checking, thinking through every move I made to get just the right shape drawn onto the plywood. Then I carefully started making each cut, stopped, looked over what I'd done, remeasuring again. Then on to the next rip.
When I'd finally got the final cut done, I took the raw piece of wood down to the boat to see how it fit. Close, but not quite perfect. Back home, I shaved a bit more off one end to account for the height difference from front to back. Another trip to the boat and it looked nearly perfect. Pretty darn close for an amateur trying this for the first time.
I pulled the teak wood trim pieces off the locker, sanded and revarnished them over several days.
 After carefully sanding the new panel with finer and finer grits, finally ending with double 00 steel wool, I cleaned it carefully with tack cloth, a product I had never used before. It basically picks up every bit of the dust and wool left behind from the sanding process making it more likely you'll get a smooth finish when applying epoxy and your final finish.
 |
| Finished panel! |
All edges of the new panel have been painted with the gooey epoxy and left to dry before the second coat was applied. Careful sanding of the epoxy prepared it for painting. I found a deck paint made by Rustoleum that went on beautifully. Not a brush stroke is visable. A couple of coats of this and the panel was ready for installation.
The biggest problem was getting all the trim pieces back in place and the entire locker put back together. The finished product turned out so nice I almost suprised myself. I point it out to everyone who comes aboard and they politely compliment me but I know they are probably thinking that such a piddly little repair is kind of silly. But I am proud and so is my wife. And the boat looks so much better when I climb aboard.
I know there are more places aboard that will need this same treatment sooner than later but at least I know I can do it when the time comes.
 |
| My plan and measurements on top of the rotten panel |
No comments:
Post a Comment